Showing posts with label damask. Show all posts

Thursday, January 16, 2014

It's All In the Detail

So I've been busy this past week, working on some new ideas for cookie gift sets and baskets, as well as testing recipes and frostings for some new cupcake flavours.  Here are a few new cookies I created for the love of Valentines:

1.  Traditional Valentine's Day 

I used a stencil and red AmeriMist  to airbrush some gorgeous lace patterns on the cookie, and followed up with a bit of pearl to add a slight sheen.  I've had my airbrush system for awhile now, and used it occasionaly but was a bit scared to use it on larger projects.  While the method can really transform an otherwise flat looking or one dimensional cookie or cake, the idea of ruining an otherwise perfect canvas, that took many hours to complete is a little nerve-racking. My lovely cousin-in-law (is that even a real title?) sat alongside me and gave me the push I needed.  Thanks Mel!  My fears of airbrushing are over and now I want to airbrush EVERYTHING!  The airbrush I own is from Amazon and works wonders.  Stencils can be purchased at any craft or hobby store, or try making your own!

Red AmeriMist and Pearl Sheen 
  
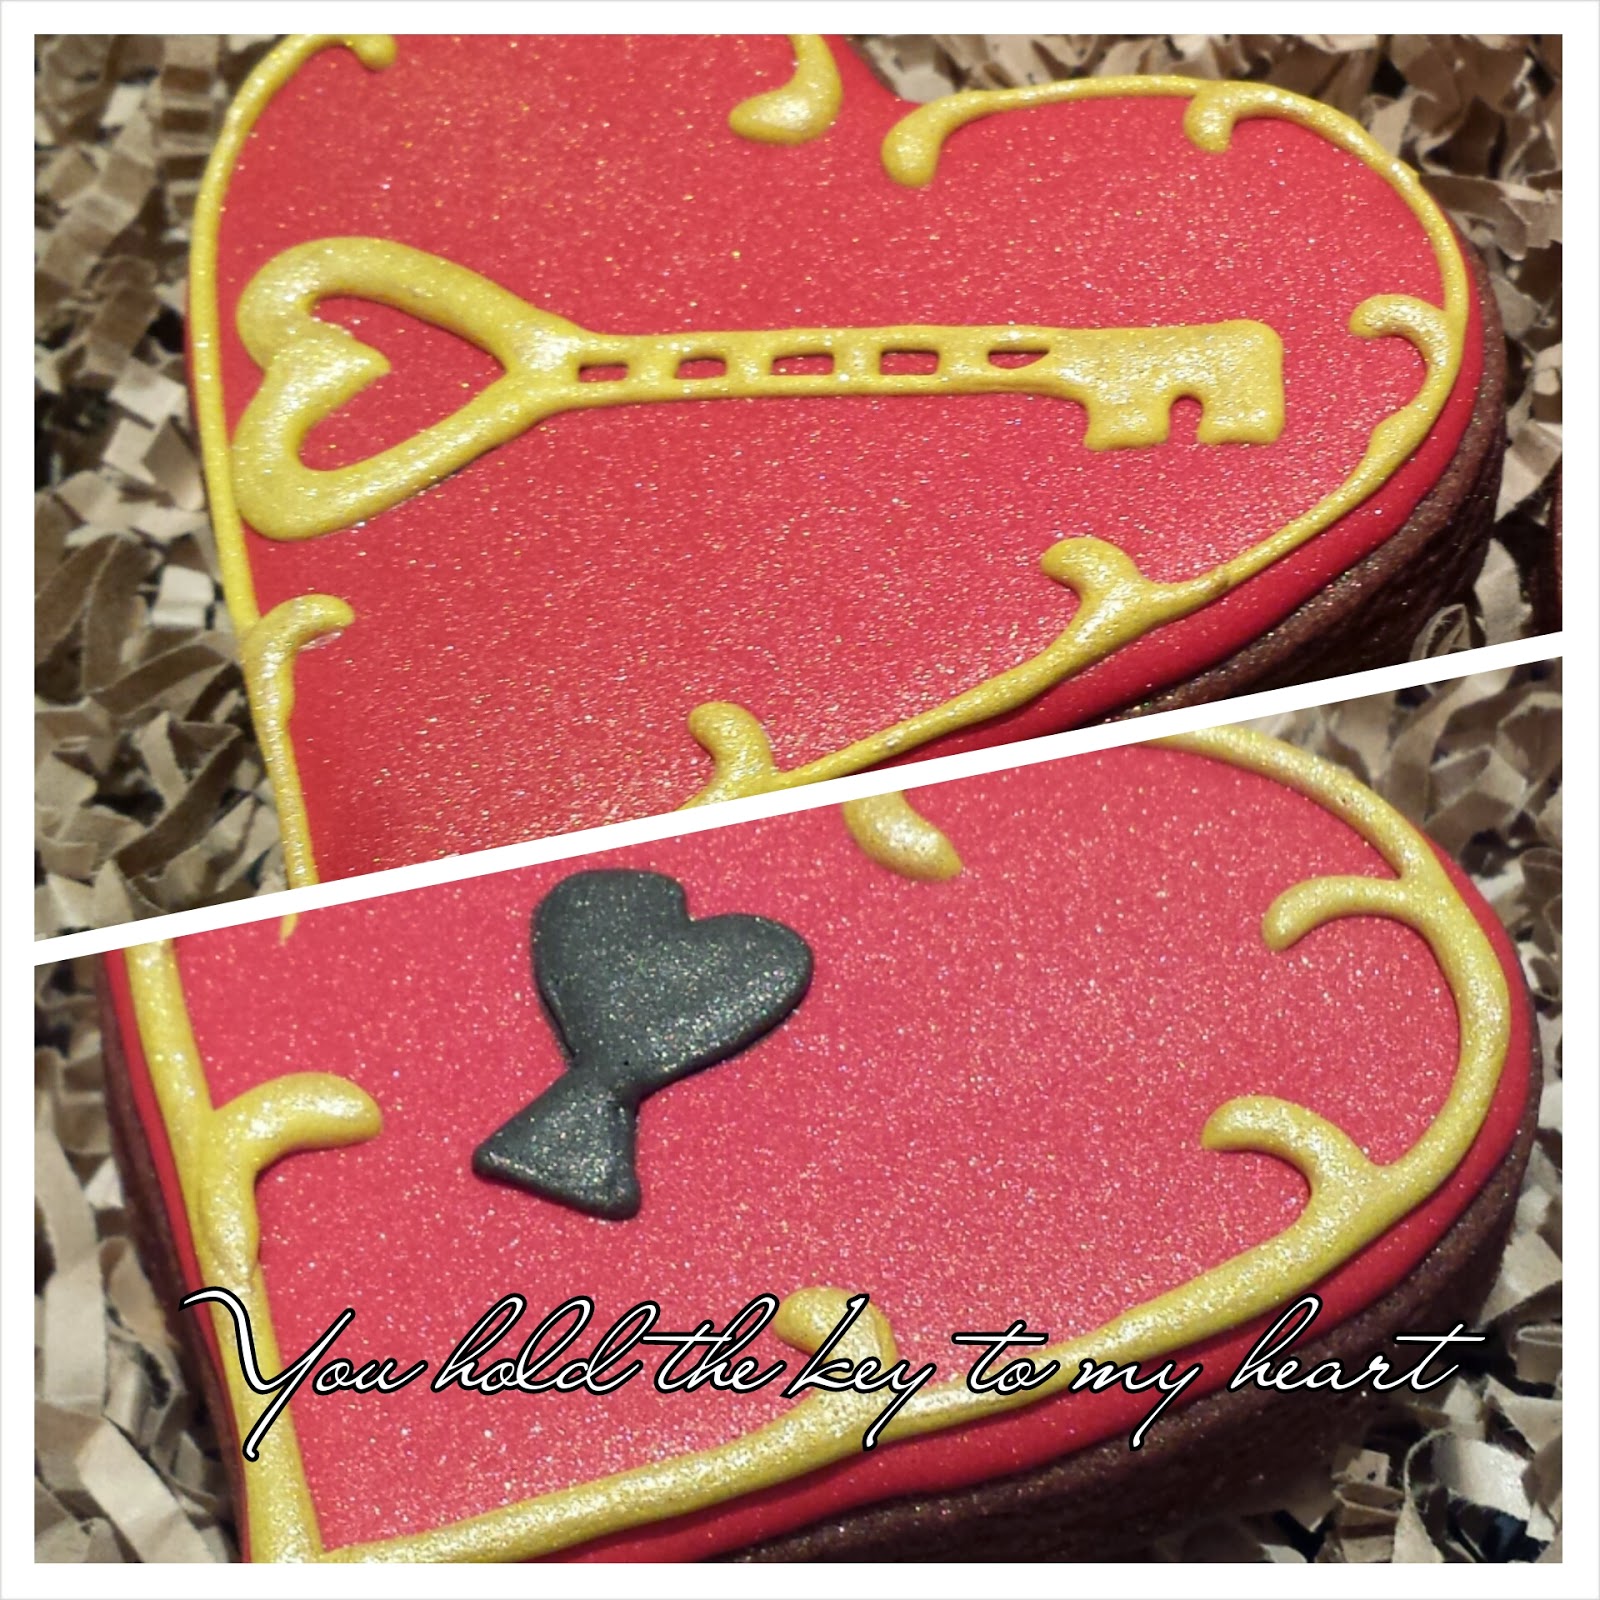
 2.  You Hold the Key to My Heart

A bit corny, yes, but I loved designing this set with a play on words.  I began with a deep red base and iced the cookie, allowing it to dry a good 6 hours.  I then piped on the black heart-shaped keyhole, followed with the yellow border and allowed those to dry a few hours before hand-painting the yellow with gold and then finishing off the entire cookie with a light spray of gold mist from my airbrush.  The large open heart cookie was sprayed in gold using another lace stencil.


3.  Bee Mine?

Yet another play on words.  While the set is relatively small, this took much more time than the two sets above.  The beehive was piped with alternating layers, to create some dimension.  After allowing each section to dry, I dusted on some dark brown petal dust in the crevices to add some depth, following with a royal icing and hand-painted miniature bee. The larger bees were piped and detailed with sanding sugar to give the black a little sparkle.  This set is probably my favourite of the bunch, as I enjoy the simplicity of the design but the impact it has with such easy techniques.   

Use petal dust or an airbrush to add depth.

4.  All You Need is Love

Lastly, I made use of those royal icing transfers I'd made last week.


Now these next few have absolutely nothing to do with Valentine's Day but they are so beautiful I have to share:

1.  Baby's First Birthday (or baby shower) 

This colour palette and design really makes me want to have another baby.  Kidding.  I am SO thankful those poopy diaper days are over but that doesn't mean I don't love babies and all the cuteness they bring. These cookies looked great with the pastel theme, but a little sanding sugar and pearl transformed them into something a bit magical---at least I think so, and hopefully so do you!


2.  Ready for Spring

New stencils + Airbrushing Confidence = Spring bouquet!
I really wish I had some photography skills, or a good camera at least, because I wasn't able to capture just how pretty these cookies are in real life.  The cookies have a unique quality to them, depending on which angle you look at the cookie it has a different colour.  I would say the effect is similar to that of a duochrome nail polish or paint.  


3.  Black Diamonds

This is my absolute favourite set I've made this January.  I won't bother describing the cookies as they sorta speak for themselves.


Now the last thing I wanted to mention today was that Andrea's Oven will be a featured vendor at the Spring 2014 Baker's Market.  This market is similar in concept to that of your local community farmer's market, only it is indoors and sells only freshly baked goods to satisfy any sweet (or savoury) tooth around.  Vendors will be showcasing a variety of products from mouth-watering macarons, to hearty 12-grain breads, and of course some hand-decorated, labour-intensive sugar cookies that are not only easy on the eyes, but taste damn good too.  You like how I slipped that one in there?  

Anyway, the market runs all spring, on Sundays from February 16 to May 4, 2014.  If you get a chance, come and stop by to say hi, and have a sample or two or three...after that I'm gonna have to start charging you.  Kidding.  Sorta.  =)  I will be offering sugar cookie gift baskets and boxed sets as well as cupcakes in some new and unexpected flavours----Chai Vanilla Bean anyone?  If you haven't found your way here through Facebook, welcome!  Stop by Facebook and "Like" if wanna get more info and updates from Andrea's Oven.

Until next time, Happy Baking!


Wednesday, January 8, 2014

Happy New Year!!

Although this post is a week or so late, I still want to wish everyone a Happy New Year!  As everyone begins to get back into the grind I have found myself in a bit of a baking slump.  I have a million and one new ideas to create and share but just don't know where to begin. We have Chinese New Years approaching on January 31, the Year of the Horse and soon following will be Valentine's on the 14th of February.  

To get myself back into the swing of things I decided to work on a few cookie decorating techniques that I'm not all that comfortable with but would like to master or have never even tried at all.  

First up:
Cross-stitch Patterns (or lace) - is a bit of a tricky technique, as you need to have the right consistency royal icing, a steady hand, lots of patience and you better know your numbers! This was my first attempt at cross-stitch and definately won't be my last.  The icing wasn't as elastic as it should be, but I'm sure that can be solved by adding some piping gel to the royal icing beforehand.  As for my wobbly lines...that is gonna have to be a work in progress.  If you want to see a pro cookie decorator do this, try watching this video by Haniela who is not only an awesome cookie artist, but she does most of her work with just a regular grocery store zip-seal bag! 
Cross-stitch Technique
Second up:
Royal Icing Transfers - I love the way this turned out; no pun intended.  I have always wanted to purchase a Kopykake projector but with the price being a bit steep for a hobby decorator such as myself, royal icing transfers are the way to go.  My first attempt a couple of months back didn't end well and I never tried again. No beginnings though, right?  

I started off by printing a template of the famous pop art "Love" logo in numerous sizes.  Once printed, I slipped the paper into a sanitized sheet protector, and basically traced the logo with a 1.5 PME tip and 10-second royal icing.  When dry, these can be applied to wet royal icing, fondant, *buttercream etc.  For those worried that the sheet protector isn't FDA approved, you could use parchment paper, wax paper or even an acetate sheet.  I find parchment ripples from the moisture, wax is a bit too difficult to see through and the acetate isn't readily available.  I've read that sheet protectors are safe to use, so I went ahead and tried.  

This technique can be done with various images or logos or even free-hand if you like.  It is a great way to add dimension to a cake or cookie.  Once piped, let these dry completely before handling.  Also, they are quite delicate so handle with caution.  These transfers can be stored in an air-tight container for future use.  I made quite a few of these and will be using them on future Valentine's Day cookies.  Keep an eye out for that soon!

*buttercream - the fats in the buttercream will start to dissolve the transfer after a few hours, so serve your guests immediately if using, or apply to surface right before serving. 
Royal Icing Transfer


Third Up:
Silicone Molds - Fondant decorations don't necessarily have to be used with cakes or cupcakes, but can be used on cookies too.  I recently ordered a few handmade, food-grade, silicone molds from Christine's Molds, hoping to broaden my decorating skills.  These molds can be used with fondant, chocolate, gumpaste, or even clay for the crafty person.  

If using fondant, be sure to dust the mold with cornstarch, brushing away any excess to prep the mold. Knead your fondant until soft and pliable, roll into a ball and press firmly into the mold, making sure to push into all nooks and crannies.  Using a cornstarch dusted fondant roller, roll over top to ensure there are no gaps between the fondant and the mold.  Trim any excess fondant, so the fondant is flush with the mold and you have a smooth, even surface. Place in the freezer for five or so minutes to firm up.  Once firm enough to handle, flip the mold over so the fondant is facing your clean surface, and slowly roll the silicone mold back. The fondant piece should pop out without any problems.  Let air dry completely before painting or airbrushing.  


Fondant Decoration using Silicone Mold
Lastly:
Royal Icing Stencils - These are my favourite of the bunch.  It is so simple, anyone can do it. All you need are a few pre-iced cookies (royal icing base should be completely dry before attempting this), stencils of your choice (I got mine here), piping consistency royal icing, and an offset spatula.  Arrange the stencil how you would like it to appear, scoop a generous amount of royal icing onto the back of the spatula and carefully spread over the stencil. Wipe off any excess icing from your spatula onto the side of a bowl or clean towel, and wipe the stencil once more, leaving behind a thin, even film.  Slowly lift the stencil from one corner, making sure not to smudge the still-wet icing.  Let dry.  You can now paint the stenciled icing, or leave as is.  


Royal Icing Stencil 


Tomorrow is another day for cookie experimenting.  Next week will be frosting recipes.  I've got my tastebuds set on some chocolate chip cookie dough frosting, as well as some chai vanilla bean frosting.

Happy Baking!